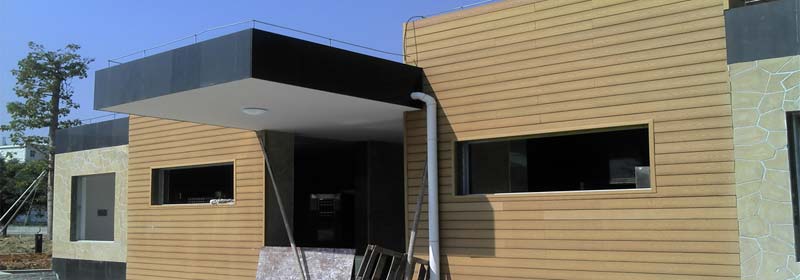
Different composite cladding designs use a variety of installation systems, here at Wallong we have chosen what we believe to be the quickest, easiest and securest way to install our SQB-15621 overlap composite cladding. We have created a short article explaining what you'll need to consider when installing the composite cladding.
For installing the composite cladding installation guide, please click here. Let's start at the beginning and guide you step by step through the whole process:
Required Tools for Installing Composite Cladding
Chop Saw
Any wood cutting blade can be used but fine teeth are recommended for a professional finish.
Circular Saw
Power Mitre Saw can also be useful for efficiency and bevelled edges
Jig Saw
Hand Drill - 3mm and countersink drill bits, used for simple straight cuts, radius edges and for intricate shapes.
Drills
Used for creating clearance holes using appropriate-sized wood drill bits depending on the size of the fixing. It also could be used for screwing fixings through clearance holes to firmly secure
Objects
Other tools: Tape Measure, Carpentry Square, Spirit Level, Safety Glasses and relevant Personal Protection Equipment, Calculating Material Requirement

To decide how much wood plastic composite cladding you will need, you can either follow your layout or follow the method below. Please email our team for any assistance with this process, we are happy to offer a quote based on your quantity.
Except for the cladding, you will also need to fix joists, fascia boards and fixing screws. Below are our quantity recommendations:
Joists: Require 3-3.5m per square meter of Cladding
Fascia Boards: Depending on the dimension and situation of your installation are
Fixing screws: Require 15 pcs per square meter cladding
Installation Steps of Composite Cladding
Step 1: Fix the joists according to marked distance. The best span between each joist should be 300-400mm.(Remark: the first joist should be installed min. 20mm from the floor)
Step 2: Screw starting clips to make sure the first cladding board is straight, so the cladding lines up perfectly.
Step 3: Put the first cladding onto the level starters, then pre-drill a hole on the cladding, the length of holes is suggested to be 15mm, and the width is depended on the cap of the screw ( Noted: The cap of the nail should be larger than the width. ) The span between holes should be 300-400mm to allow expansion & contraction.
Step 4: Once secure the first one, place the next cladding board in place and repeat this process, checking the level before each board is fixed. The screw will be invisible during the installation. Fix all boards until the top (or side for vertical) edge of the wall, you may be required to shape boards around doors and windows.
Finishing Steps of Composite Cladding
Install a Fascia Board to finish off and cover the last cladding board.
Remark: Both of these WPC timber products can be cut to size and require pre-drilling and screwing down to joists.
If you have any further questions feel free to see more installation details or contact one of our technical team at inquiry@wallongwpc.com.


